Sealing Interlocking Pavers: Durability and Design Tips


Interlocking pavers look timeless when they are clean, color-rich, and tight. They also take a beating. Sunlight fades pigment, vehicles track oil, irrigation leaves mineral rings, and weeds creep up through joints. Sealing does not solve every problem, but it does two big things very well: it protects the surface and brings back the color. The rest is about preparation, timing, and matching the right paver sealer to your goals.
What sealing actually does
A good sealer creates a barrier against moisture, UV rays, and stains. It slows down fading, keeps joint sand in place, and makes maintenance easier. On many concrete pavers, a clear film also deepens the tones, so the reds and charcoals look saturated again rather than chalky. Clay pavers benefit from stain resistance and easier cleaning, even if the color change is subtler. Natural stone, when sealed with the right product, resists efflorescence and organic growth without looking plasticky.
That said, sealers wear. Expect two to four years on high-traffic driveways and three to five on patios, sometimes longer under covered areas. Climate and sun exposure matter. In humid regions, algae and mildew will stress even a good coating. In hot, dry areas, UV exposure and heat cycles break down the resin faster. Local conditions in places like Florida mean that paver cleaning in Lutz or nearby communities becomes part of an ongoing care cycle: wash, evaluate, and reseal on a sensible schedule.
Start with the pavers you have
Interlocking pavers can be concrete, clay brick, or natural stone. They handle sealers differently.
Concrete pavers are porous and thirsty. They accept both penetrating and film-forming products. Film-forming sealers can enhance color dramatically, but the wrong product or poor prep can cause whitening, streaks, or trapped moisture. Clay pavers are dense, with smaller pores and a smoother finish. They can become slippery if you use a heavy film. Penetrating products tend to perform better on brick in the long run. Natural stone varies widely. Sandstone drinks sealer, granite hardly absorbs any, and travertine sits in the middle. Always test a small area, especially with anything labeled “color enhancing.”
If you do not know what you have, look at a spare paver or an edge. Concrete pavers show a fine aggregate matrix with small stones. Clay bricks look uniform in body with a fired surface. Stones have inconsistent mineral texture and veining. This basic identification helps you select a compatible paver sealer and avoid the wrong chemistry.
Clean like a pro before you seal
Sealer locks in whatever is on the surface, good or bad. A sloppy clean equals a sealed mess. The best results come from methodical washing and drying.
Begin with dry debris removal. Blow off leaves, sand, and loose material. Scrape weeds out of joints. For heavy organics or black algae, pre-treat with a suitable cleaner. Sodium hypochlorite solutions are common for mildew on concrete, but they need careful dilution and thorough rinsing. Degreasers help with oil spots but should be contained so they do not kill nearby plants.
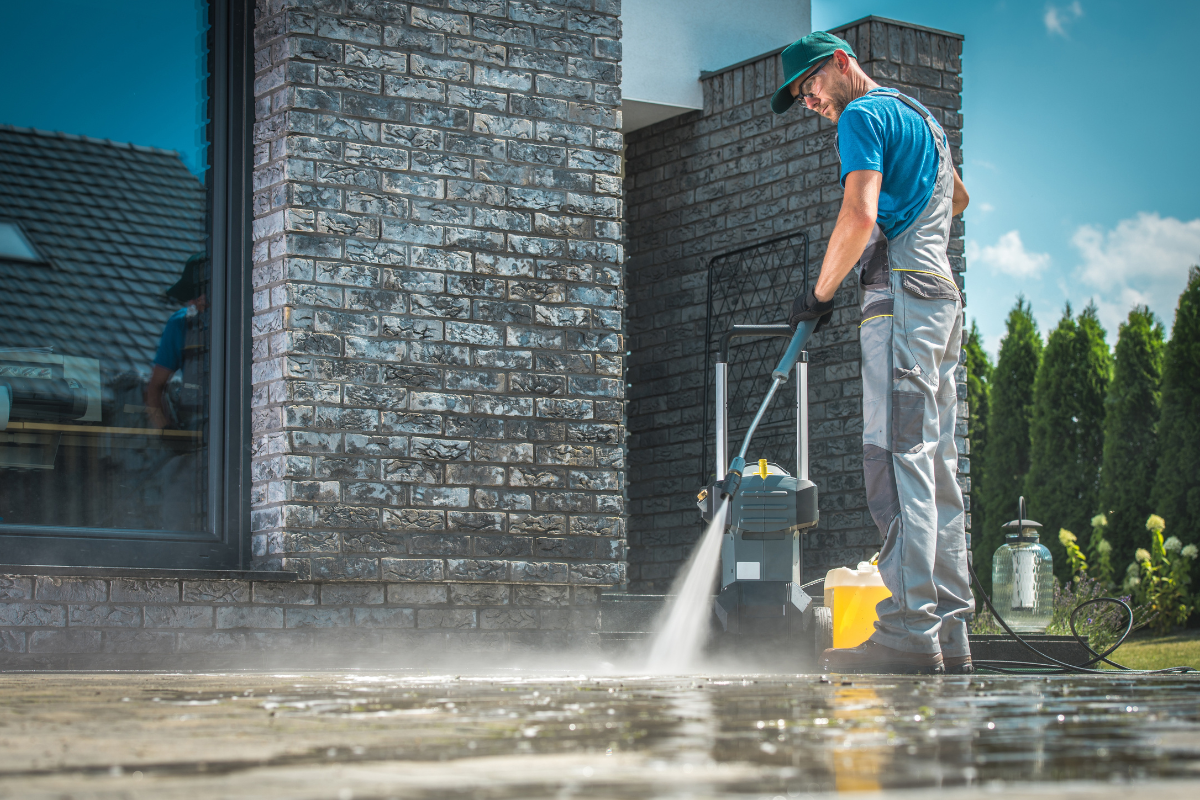
Pressure washing is the workhorse. The goal is to remove dirt, failing sealer, and biological growth without scarring the surface. A rotary surface cleaner attached to a pressure washer delivers even results on larger areas. Reserve a tip for edges and tight spots. Keep the wand moving. Most techs work in overlapping passes to avoid tiger stripes. If you are searching driveway pressure washing near me to find a pro, ask whether they use uniform surface cleaners and how they handle joint sand loss during washing.
Efflorescence, the white powdery staining from migrating salts, requires special attention. A buffered efflorescence cleaner will dissolve it without burning the paver, but it must be rinsed well. Skipping this step often leads to haze under the sealer months later.
Expect to lose some joint sand. That is normal. After the surface dries, sweep in polymeric sand or kiln-dried joint sand to refill. Polymeric sand hardens when misted, which helps lock joints and resist weeds. On pool decks with wide joints or certain stone types, regular joint sand may be safer to avoid bonding issues. The key is full, even joints that sit about one eighth inch below the chamfer or bevel line of the paver.
Finally, verify dryness. Most sealers need the pavers bone-dry through the top quarter inch. This typically takes 24 to 48 hours without rain, more if humidity is high or the surface is shaded. If you can pull a damp fingerful of sand from the joint, wait. Moisture trapped under a film-forming product can cause whitening or blushing that is difficult to fix. The patience here separates professional results from do-overs.
Choosing a sealer that fits your goals
You can group paver sealers into two categories: penetrating and film-forming. Within those, water-based and solvent-based options affect appearance, application, and safety.
Penetrating sealers soak in and leave little to no visible film. They repel water and stains, resist UV breakdown, and rarely peel. They preserve a natural look, which suits clay pavers and most stones. They do not dramatically deepen color, although some “enhancing” penetrants will warm tones slightly. They are generally more forgiving when moisture is present, especially water-based options designed for damp set conditions.
Film-forming sealers sit on top, creating a micro-thin coating. They deepen color and can add a satin or glossy sheen. They also stabilize joint sand. Overapplication or the wrong product on a dense surface can create slipperiness, so be mindful around pools and slopes. Film-formers can peel or haze if moisture gets trapped or if prepping was rushed. Solvent-based acrylics often give the most vibrant color pop and are easier to re-emulsify for fixes, but they come with stronger odors and stricter ventilation and flammability concerns. Water-based film-formers have improved a lot over the last decade and are a favorite for occupied homes where odor control matters.
A few practical matchups:
- Concrete driveway with faded color, full sun, and heavy traffic: a high-quality acrylic film-former, often solvent-based for stronger color, applied in two thin coats with anti-slip additive. Expect resealing every two to three years.
- Clay brick walkway under trees: a penetrating sealer that resists organic staining without changing the look. Less risk of slipperiness, easy to maintain.
- Travertine pool deck: either a breathable water-based film-former with a slip-resistant additive or a penetrating enhancer that warms the tone without a slick finish. Test a small area to ensure no dark spotting in the fill holes.
- Mixed-use patio with outdoor kitchen: penetrating sealer with strong oil and grease resistance, or a low-sheen film-former that strikes a balance between color depth and easy clean-up.
If you are evaluating paver sealing near me providers, ask what they propose and why. A straight answer tied to your surface type, exposure, and maintenance habits is a good sign.
Application that avoids headaches
Sealing looks simple: roll it on, walk away. The detail work decides whether it holds up.
Plan for weather. You need a dry forecast for at least 24 hours after application, sometimes longer. Avoid sealing in the hottest part of the day. Sun-baked pavers can flash-dry a water-based sealer, leading to lap lines or uneven sheen. Early morning once dew evaporates or late afternoon is safer. Wind can carry overspray onto vehicles or glass, so mask and plan your sequence.
Stir, do not whip. Many products contain solids that settle. Mix them well before starting and occasionally during application to keep the finish consistent. If you are adding anti-slip media, disperse it evenly. For film-formers, thin coats are always better than heavy ones. A common rule is two light passes instead of one thick one. You should see the color enrich without puddles.
Edges and detail areas benefit from a brush cut-in, then a roller or low-pressure sprayer for broad coverage. If you spray, back-roll to level out the film. Watch for pooling in low spots or along borders, especially on textured pavers. If you see milky areas on a water-based product during application, that is often just temporary emulsification that clears as it dries. If it persists, moisture is usually the culprit.
Respect recoat windows. Many sealers allow a second coat within one to four hours, while the first is still tacky. Waiting too long forces you to sand or clean mechanically for a bond. Walkable times vary from one to six hours. Vehicle traffic often requires 24 to 72 hours. A professional pressure washing service that also seals will rope off and leave clear instructions about when to resume use.
How cleaning and sealing extend lifespan
Pavers themselves last decades. Their look does not unless you maintain them. A washing and sealing cycle, done right, slows down the common failure modes.
UV breakdown bleaches pigment on concrete pavers. A UV-stable sealer acts like sunscreen for pigment. You still lose some intensity over years, but much slower. Water intrusion brings efflorescence to the surface and feeds algae. Sealer reduces water absorption so you get fewer white blooms and the surface dries faster after rain, which makes algae less happy.
Stains tell a similar story. Sealed surfaces give you more time to wipe up. Oil from a parked car, tannin from leaves, pigment from a dropped popsicle on a summer patio. On an unsealed paver, these penetrate quickly. On a sealed one, they sit longer on the surface and clean more easily.
Joint integrity is the quiet contributor. When you pressure wash, you inevitably disturb sand. Replacing and locking that sand keeps edge restraint and interlock working the way the system was designed. It also helps resist weed intrusion. No sealer or sand completely eliminates weeds, but you can reduce them from a weekly nuisance to a quick monthly check.
I often see homeowners contact driveway pressure washing near me providers after a few years without maintenance. The surface looks blotchy and the joints are low. A single well-executed service cycle brings it within 80 to 90 percent of new. The last bit usually needs targeted stain work or, in rare cases, paver replacement in spalled or chipped zones.
When things go wrong, and how to fix them
Most issues trace back to moisture, application rate, or product mismatch.
Whitening or blushing appears as a cloudy film, often in shaded or low areas. Moisture trapped under a film-former is the usual cause. On solvent acrylics, a xylene re-emulsification sometimes opens the film, releases moisture, and re-levels the coating. On water-based products, a light solvent wipe is not an option. Stripping may be necessary. Professional crews evaluate small test patches before committing to a full fix.
Peeling or flaking indicates poor adhesion to the substrate or a problem between coats. Heavy application, contamination, or waiting too long before recoating can cause it. Light sanding and a maintenance coat may help if the failure is superficial. If it is widespread, stripping and starting fresh avoids chasing problems for years.
Hazing that looks like efflorescence under the sealer requires a chemical strip, efflorescence treatment, thorough rinse, and complete dry-out before resealing. This is where patience pays. People rush this step, and the haze returns.
Slipperiness shows up most often with high-gloss films on dense surfaces, especially when wet. Anti-slip additives help. They are clear but introduce a fine texture you can feel. On pool decks, a matte or satin finish with additive is safer than a deep gloss. If gloss is already down and slippery, a maintenance coat with added grit can improve traction.
Uneven sheen often means inconsistent application or a thirsty surface in some zones. A leveling maintenance coat usually evens it out. If color enhancement seems patchy, you may be seeing density differences in the pavers themselves. Again, testing and light coats help.
Design choices that work with sealers
Sealers alter how light plays on the surface. That matters for curb appeal and safety. A high-gloss acrylic on a charcoal driveway looks dramatic, especially at dusk when the surface reflects the sky. It also shows dust and hard water spots more readily. A satin finish hides day-to-day dust while still deepening color. On lighter pavers like cream or taupe, a penetrating product that keeps a dry look can be the better design choice, especially near pools where glare is a factor.
Joint sand color is another subtle design lever. Most people default to tan or gray. If your pavers have warm tones, a buff sand warms the whole field. For cooler palettes, gray sand sharpens the lines. Polymeric sands come in several shades, but take care with darker options, which can highlight every joint flaw.
Edge restraints and borders respond well to color enhancement. If you have a darker soldier course around a patio, a film-former helps that border pop visually, defining the space. On the flip side, if you prefer a quiet, monolithic look, a penetrating sealer keeps tones closer together.
Lighting plays differently on sealed surfaces. Under path lights, a satin film reads as more vibrant without glare. Under strong security lights, a glossy driveway can create bright hotspots. If you are planning low-voltage lighting, consider how your finish will interact with it.
Climate and scheduling realities
Humidity, dew cycles, and temperature swings all matter. In the Southeast, morning dew is a constant for much of the year. Even if the forecast is clear, dew can add hours to dry time. Plan sealing for late mornings once the surface has warmed and dried, then let it cure before the next dawn. In dry, hot climates, wind and low humidity can flash-dry water-based products. Work smaller sections so you can maintain a wet edge.
Cold weather limits are product-specific. Many water-based sealers prefer surface temps above 50 to 55 degrees Fahrenheit. Solvent-based products can tolerate slightly cooler conditions but risk slow cure and dust contamination. If you schedule with a contractor, ask how they adapt to shoulder seasons. Reputable companies will reschedule rather than risk a marginal day.
For homeowners searching paver cleaning Lutz during Florida’s rainy months, consider planning cleaning and joint sand early in a dry window, then seal as soon as the surface moisture is right. The lag between washing and sealing is when windblown debris lands and pets or kids track across the patio. Shortening that window reduces surprises.
DIY or hire a pro
Plenty of homeowners seal their own pavers with good results. If you have a manageable area, time to prep correctly, and comfort with equipment, it can be a satisfying project. Buy a quality product from a reputable supplier, not a bargain bin brand that yellows or peels. Read the technical data sheet, not just the front label. Do a test spot.
Hiring a pro brings specialized equipment and judgment. A contractor who does both pressure washing and sealing sees edge cases daily: how to handle stubborn rust, whether to acid wash a clay brick without etching it, how to strip a failed coating efficiently. They also carry the liability for overspray on a neighbor’s car or an accidental plant burn. When you start a search for a pressure washing service, ask targeted questions:
- What cleaner will you use on my specific stains, and how will you protect nearby landscaping?
- How do you handle efflorescence? Do you test for it before sealing?
- What paver sealer do you recommend for my material and why that chemistry?
- How many coats, and what is your target coverage rate per gallon?
- How will you add slip resistance near the pool or slope?
- What is the expected maintenance cycle in my climate?
Clear, experience-backed answers are worth more than a low bid.
Budgeting and long-term planning
Costs vary widely by region and scope. As a rough guide, professional washing and sealing often ranges from a few dollars per square foot, with natural stone and stripping work at the high end. Driveways with heavy oil or paint removal cost more due to extra steps and chemicals. DIY material costs for a good sealer typically run a fraction of that per square foot, plus sand, cleaners, and any rented equipment.
Look beyond the first cycle. A well-executed project sets up easier maintenance. You might do a light wash and a maintenance coat in two years rather than a full strip and reseal. Some homeowners schedule a mid-cycle rinse every six months during heavy leaf drop or pollen season. The small routine effort keeps the surface looking consistent and prevents localized staining that would require aggressive cleaning later.
Small anecdotes with big lessons
A homeowner called after a summer storm broke right as they finished sealing a clay brick walkway. The sealer was a water-based penetrant, so no film was present, but the rain drove surface residue into low spots where efflorescence had been lurking. We let the surface dry two days, then treated the white areas with a mild efflorescence cleaner and rinsed. The key lesson was timing. We shifted future sealing to late morning windows and used a blower just before application to remove overnight pollen and dust.
On a travertine pool deck, a glossy solvent acrylic looked stunning for two weeks. Then the calls began about slipping when wet. The contractor returned to apply a maintenance coat with a fine polymer grit. Traction improved immediately with minimal change to appearance. The takeaway: always include grip media where water and bare feet mix, even if the finish looks fine dry.
A charcoal concrete driveway near a coastal road faded badly within three years. The original sealer had been a low-solids water-based acrylic applied heavy in one coat. It turned patchy. We stripped it, did a thorough pH-neutral clean, let it dry over a weekend, then applied two thin coats of a higher-solids acrylic with UV inhibitors. driveway pressure washing near me We scheduled a light clean and inspection at 18 months. The driveway still looked strong at that check, with no peeling and even sheen. Thin coats and UV resistance made the difference.
Practical maintenance after sealing
Treat a sealed surface well, and it stays sharp longer. Avoid harsh acids for routine cleaning. They can etch the sealer and paver, especially on calcium-rich stones. Use a mild pH-neutral cleaner for routine washes. Spot-clean spills quickly. Oil that sits for days has a better shot at migrating past the barrier, particularly on high-traffic areas where the film wears faster.
If irrigation heads overspray onto the driveway or patio, adjust them. Hard water spots build up and leave rings that mar glossy finishes. Trim back plants that shed heavily onto the surface. Good airflow and sun help sealed surfaces dry, which minimizes organic growth.
Expect a maintenance coat before a full redo. On film-formers, a light clean and single thin coat refreshes sheen and protection. On penetrants, you can often clean and reapply without stripping. Keep records of the product used and the date. When you search paver sealing near me three years from now, that note saves time and helps a pro match chemistry correctly.
Bringing it all together
Sealing interlocking pavers combines science and craft. The science sits in porosity, UV resistance, resin chemistry, and cure times. The craft is in reading the surface, cleaning with care, choosing a product that suits the material and the way you live, and applying with patience and precision. Do those things, and you get the durable, color-rich look that made you pick pavers in the first place.
Whether you handle it yourself or hire a pressure washing service, anchor the process in prep. Clean thoroughly. Repair joints. Let it dry. Apply the right paver sealer in thin, even coats. Respect the weather. Add slip resistance where water meets feet. Then keep up with light maintenance and reasonable expectations. Surfaces live outdoors. They will weather. With a sensible washing and sealing routine, they will weather well and look the part year after year.
Bulletproof Pavers
Address: 1523 Green Meadow Dr, Lutz, FL 33549
Phone: (813) 401-0693